Are you looking for the easiest way to post on your WordPress site? This is a short blog on WordPress post on how you can publish a post in WordPress.
A post is a long form of content on WordPress. You can use a post to create a new “story” or “article” on your blog or website. Posts can contain text, images, galleries, and even other types of content.
WordPress blog is a great place for you to share your thoughts and grow your audience.
WordPress makes it easy to create content and even easier to share with anyone. So start WordPress post creation with us without delay.
To publish a post in WordPress, you need to follow the above steps.

Table of Contents
Beginner’s Guide: How To Publish A Post In WordPress?
You don’t need to be a coded or expert person to publish a post in WordPress. As a beginner, just follow this ese article to post on your WordPress site.
We have a complete beginner’s guide on how to install plugins in WordPress and how to install a theme in WordPress. As a beginner, these two guides will help you a lot.
Step 1: Log Into Your WordPress Dashboard
To publish a post first you need to log into your WordPress dashboard.
Step 2: Create a New Post
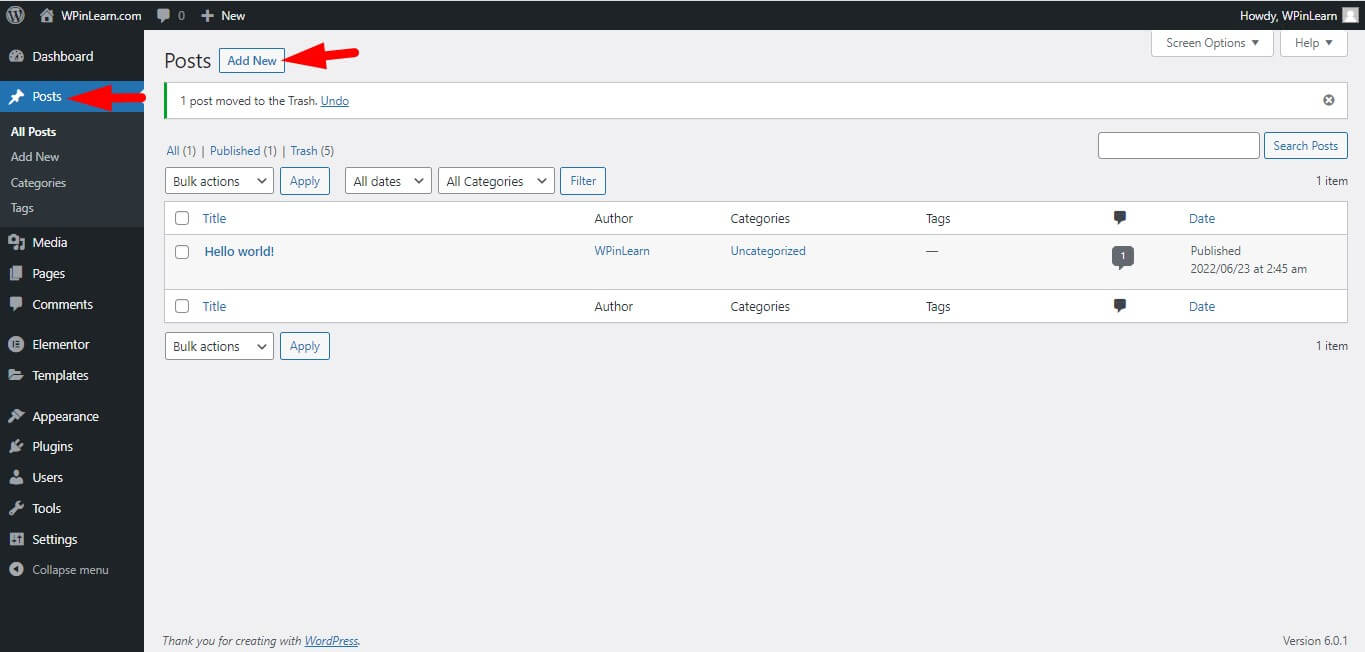
After logging in you are on your dashboard, click on Post from the left navigation menu to create a post from here. Then click on Add New from the top left.
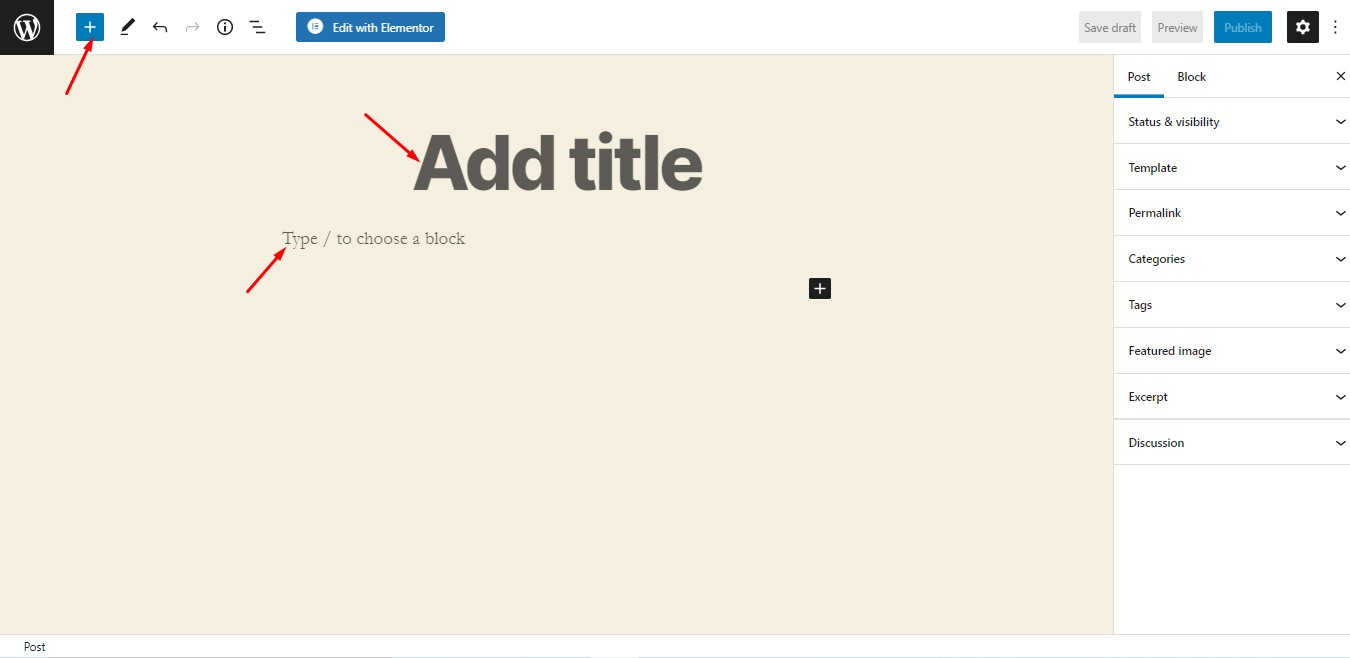
Step 3: Add a Post Title, Post Content, And Media Content.
Here Add a title for your post, Type your content then click on the + button from the left corner to add an Image.
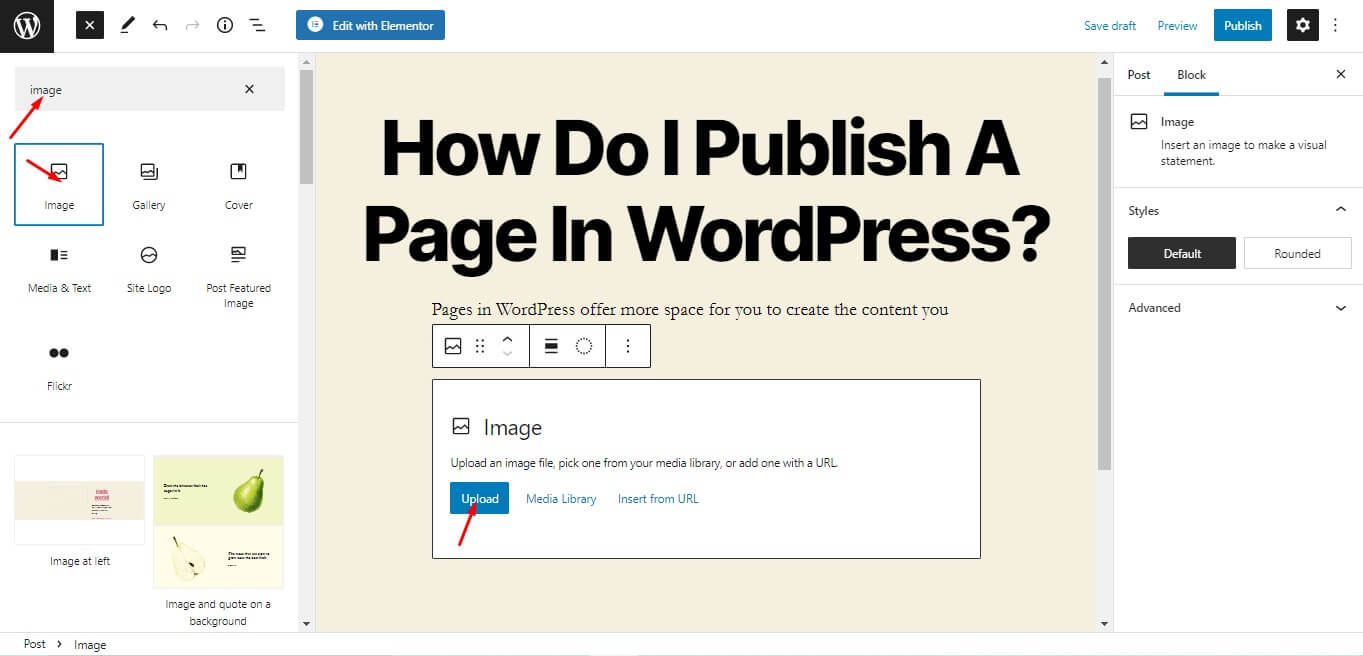
After clicking on the + button search box will appear, there search by typing the image, and clicking on it in the Image block, then you upload the image which you need.
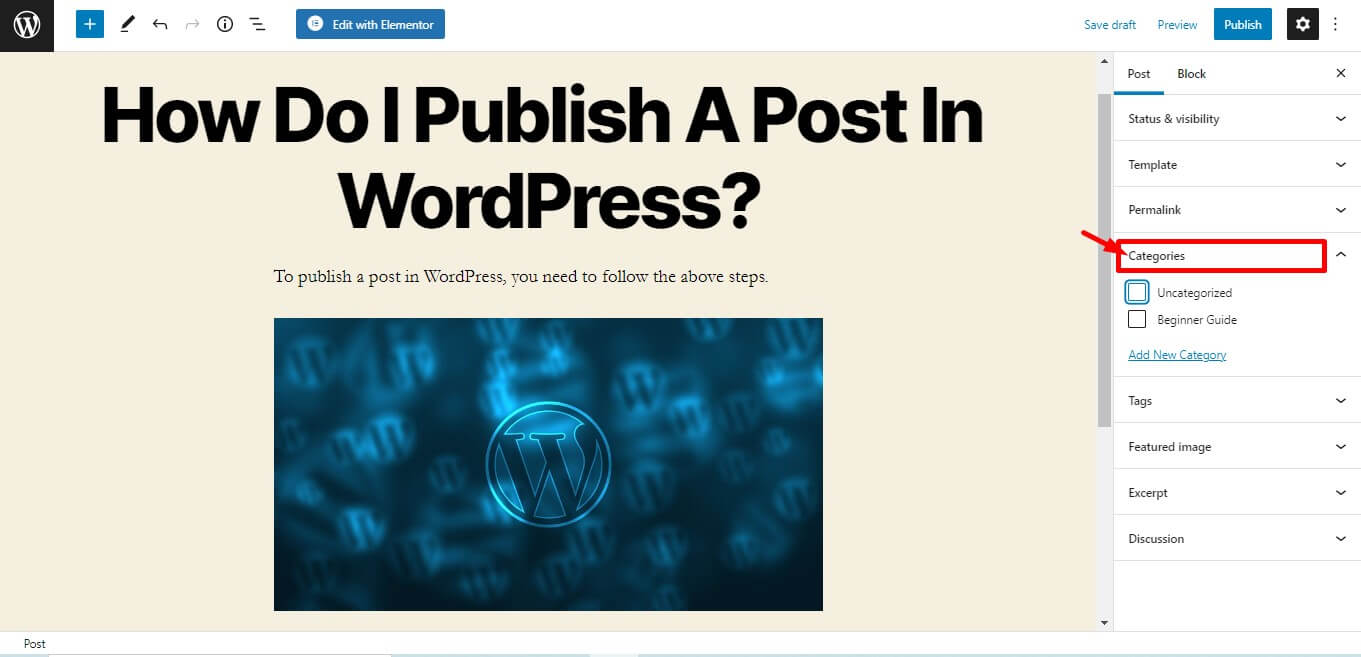
Step 4: Add Categories And Tags for the Post.
Categories are a broad classification of your blog posts. Posts are assigned to categories so that they can be found when people search for your blog’s content.
To add categories, click the Categories option in the right-hand menu. Enter the categories you wish your post to be associated with in the field labeled “Category name”. Press the Enter/Return key on your keyboard to add the category.
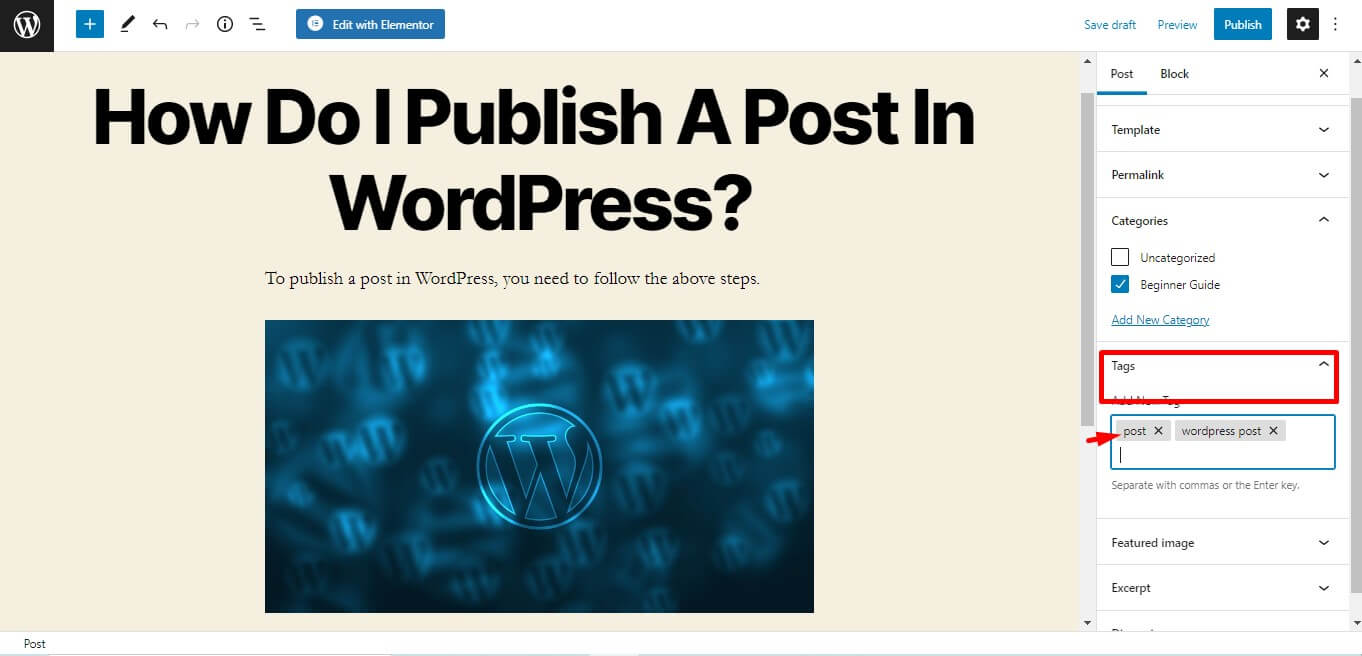
And a tag is a word that is added to your post metadata to provide additional information about the post. You can apply multiple tags for a post. Tags are separated by coma( , ). Here is an example: Tag 1, Tag 2, Tag 3.
To add tags navigate to the “Publish” and “Edit” sections on the right navigation bar. There you will find the “Tags” option under “Categories”. Fill the form with your tags and click “Save”. That’s it!
You can find the tags option under the categories.
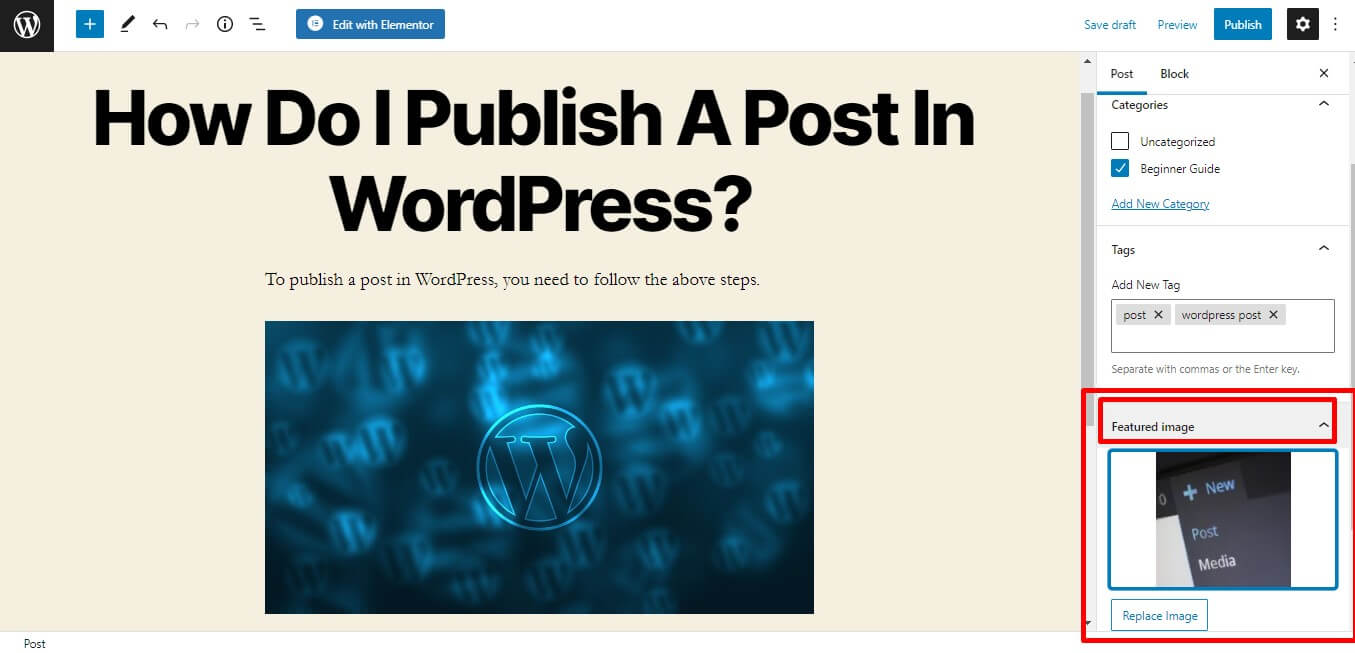
Step 5: Add a Feature Image for the Post.
Adding an image to your post is a great way to make your article more interesting and engaging. As a best practice, you should add an image to every post.
To add a featured image for your post, click on Featured Image from the right navigation bar. And set a featured image to your post.
Step 6: Publish your post.
Now you came to the final step. Here you just need to click on Publish button from the top of the right corner.
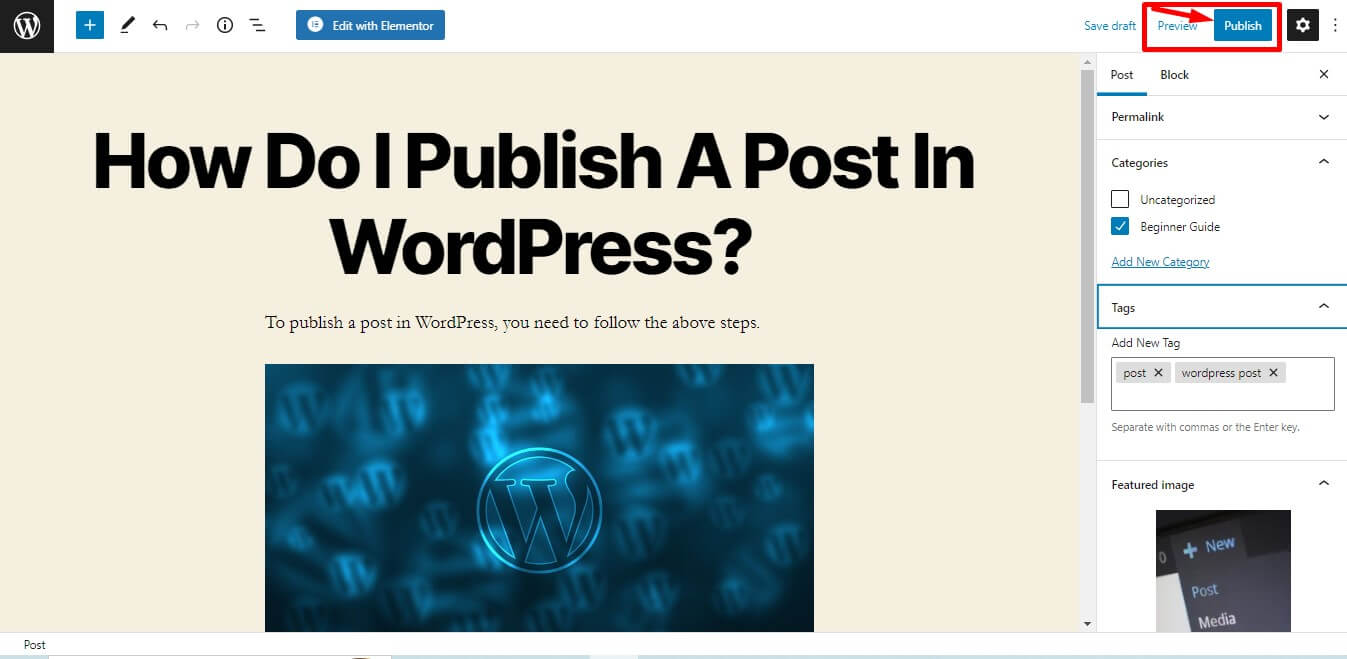
After clicking on publish button your post is live on the internet.
Now you have the basics of creating your posts. Start producing more content and build relationships with your audience.
Final Word
We hope you enjoyed this blog post on why a WordPress post is a great place for you to share your thoughts and grow your audience. If you have any questions or concerns about WordPress then you can join our Facebook community, subscribe to our Youtube channel, and follow us on Twitter.


