Do you wish to insert table in WordPress pages and posts? Data may be presented in an easily comprehensible style using tables.
Several blog postings on how to insert a table in WordPress without a plugin suggest that it is difficult or that you must use Word or Google Docs. That can be the case if you haven’t already changed to the Citadela Gutenberg theme. Older themes utilize a traditional editor with their page builders. There was also no choice as simple as the one provided by the Gutenberg editor.
We’ll demonstrate how to insert table in WordPress page and pages without plugin or any HTML code in this tutorial.
Table of Contents
Benefits of using tables in WordPress
When it comes to presenting data and content in WordPress, tables provide a number of advantages. They enable you to arrange information organization, which makes it simpler for readers to comprehend and explore the content. Tables in WordPress offer the following major advantages:
Organizing And Presenting Information Effectively
Data may be organized systematically using tables, which makes it simpler to compare and examine various components. Tables may help you present the information in an understandable and structured manner, whether you’re doing a pricing comparison, listing a product’s characteristics, or showing statistical data.
Improving Readability And User Experience
You may increase readability and user experience on your WordPress website by arranging information in tables. Users can more rapidly glance through information and locate what they’re looking for by using tables. For displaying huge or complex collections of data, this may be quite helpful.
Enhancing The Visual Appeal Of Content
Moreover, tables can improve the appearance of your WordPress articles and pages. You may match the table’s appearance to the general theme and branding of your website by utilizing CSS to change table designs. This makes your content seem more unified and polished.
How to Insert Table in WordPress
Adding tables in WordPress is really simple when utilizing the built-in block editor.
Simply write a new post or page, or edit one that already exists. While within the content editor, pick “Table” by clicking the (+) sign to add a new block.
You can either put “Table” into the “Search for a Block” to find a table block in the WordPress block editor.
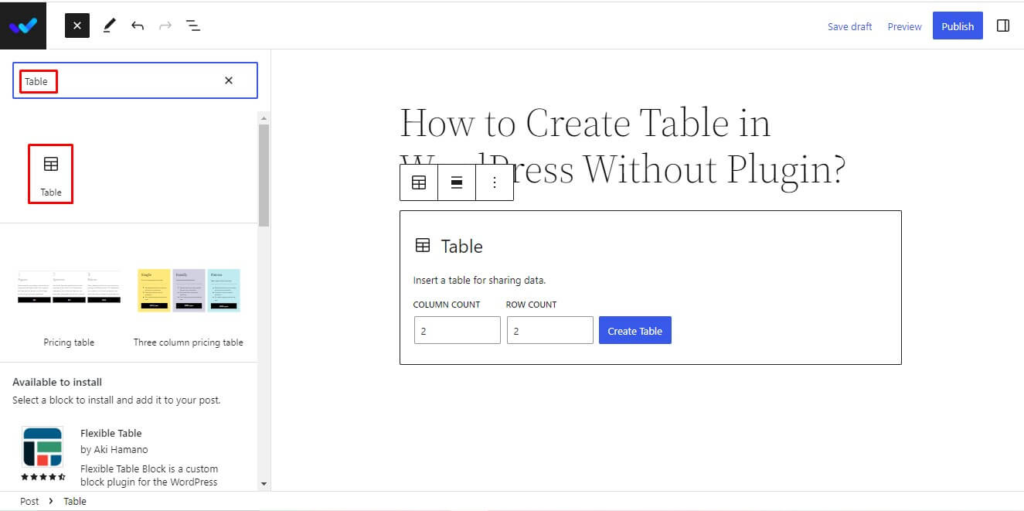
Put in how many columns and rows you need. The table cells may be filled with text, and depending on how much content is in each, they will dynamically resize as you enter. You may use this option on the right-hand side if you wish your cells to have fixed width.
A table header or footer section can also be included here. In our illustration, we built a header for the table and, under the “Color Options” tab, we changed the backdrop color to gray.
Just click on a cell at the desired location in the table if you want to add a new row or column. Then, select “Edit Table” from the menu.
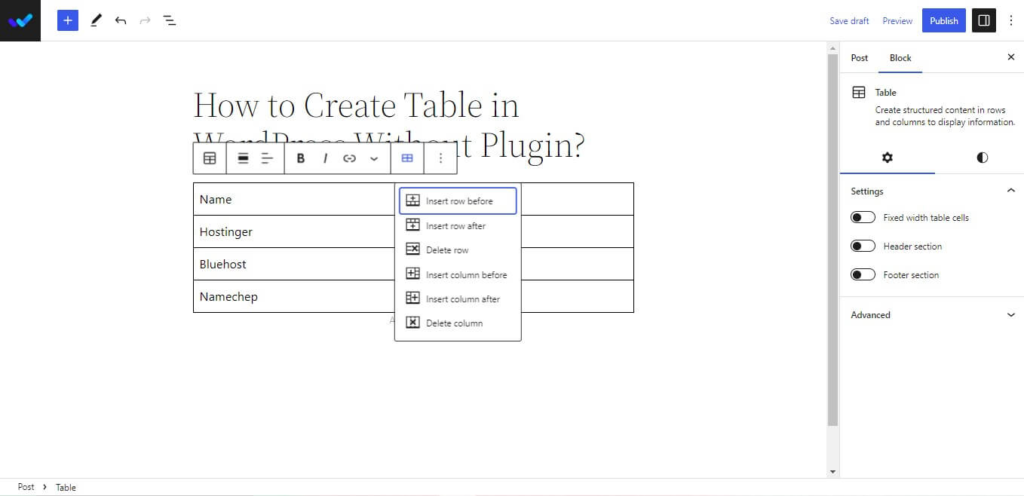
The same method may be used to remove rows and columns. Just pick “Delete Row” or “Delete Column” from the “Edit Table” menu after clicking on a cell in the row or column you wish to remove.
The text in the columns of your table is left-aligned by default. By clicking inside a column and then selecting the “Adjust Column Alignment” button, you may adjust this:
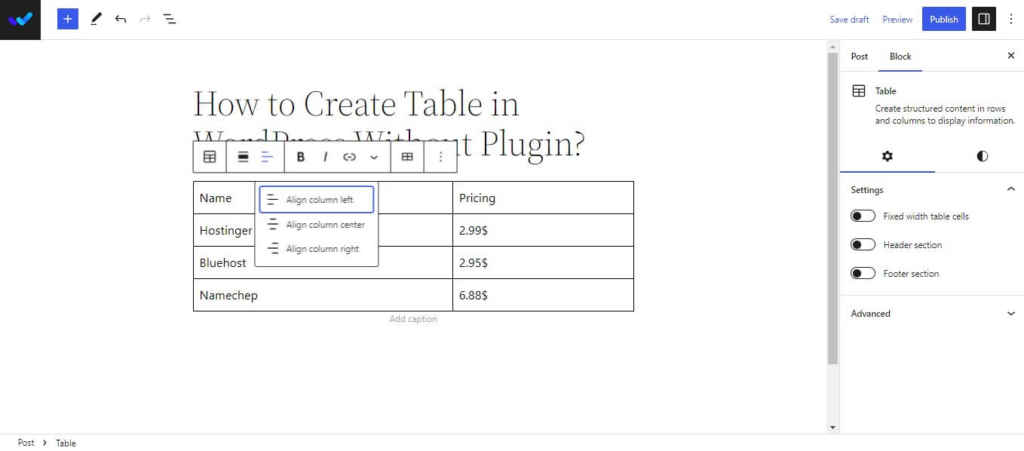
By clicking the “Change alignment” button and choosing a choice from the list, you can also alter the alignment of your whole table within the post or page.
Keep in mind that using these settings may cause your table to appear outside of the typical confines of your post area. Please be sure to preview your post or page to see how they appear since some may seem strange on your website.
We hope this article helped you learn how to insert tables in WordPress page and post without using plugins. If you liked this post, then please subscribe to the WPinLearn YouTube channel for WordPress video tutorials. Join the WPinLearn community and follow us on Twitter.


